Running low on storage space or looking to boost your computer’s performance with a shiny new SSD?
You’re probably wondering: “Can you move Windows to another drive” without starting from scratch?
The good news? Yes, it’s doable! Moving your Windows installation to a different drive isn’t as complicated as it might seem, though it does require some planning and the right approach.
Many users face this exact situation when their current drive starts filling up or slowing down.
Maybe you’ve bought a faster solid-state drive and want to transfer everything over, or perhaps your old hard drive is showing signs of wear.
In this guide, we’ll walk you through everything you need to know about relocating your Windows installation safely and efficiently, covering multiple methods that work for different situations and skill levels.
Is It Possible to Move Windows to Another Drive?
Absolutely! Moving Windows to another drive is not only possible but often necessary for optimal system performance.
Your Windows installation consists of critical system files, boot records, and registry entries that work together to make your computer function properly.
However, this process comes with certain limitations. You can’t simply copy and paste Windows files like regular documents.
The operating system creates specific connections between files and hardware configurations that must be preserved during the transfer.
You should consider moving Windows when your current drive is running out of space (less than 15% free), experiencing performance issues, or showing signs of failure.
It’s also wise when upgrading to a faster SSD for better boot times and overall responsiveness.
Additionally, if you’re reorganizing your storage setup or replacing aging hardware, relocating Windows becomes a practical solution for maintaining system stability.
Reasons to Move Windows to Another Drive
- Upgrading to a Faster SSD: Solid-state drives offer significantly faster boot times, application loading, and overall system responsiveness compared to traditional hard drives.
Moving Windows to an SSD can reduce startup time from minutes to seconds and make your entire computer feel more snappy. - Running Out of Space on the Current Drive: When your system drive reaches capacity, Windows performance suffers dramatically due to limited virtual memory and temporary file space.
Transferring to a larger drive provides breathing room for system updates, temporary files, and smooth operation. - Replacing a Failing or Old Hard Drive: Hard drives show warning signs like slow performance, strange noises, or error messages before complete failure occurs.
Moving Windows proactively protects your data and ensures continued system stability before hardware breakdown. - Better System Organization and Performance: Separating your operating system from personal files and applications creates a cleaner, more organized storage structure. This setup makes maintenance easier and can improve performance by reducing file fragmentation.
- Future-Proofing Your System: Modern applications and Windows updates require increasing amounts of storage space over time.
Moving to a larger, faster drive ensures your system can handle future software requirements without constant storage management.
Preparation Before Moving Windows
1. Back Up Your Data

Before attempting any Windows migration, create a complete backup of your important files, documents, photos, and settings.
Use Windows’ built-in backup tools or third-party software to save everything to an external drive or cloud storage.
This safety net protects you from potential data loss if something goes wrong during the transfer process.
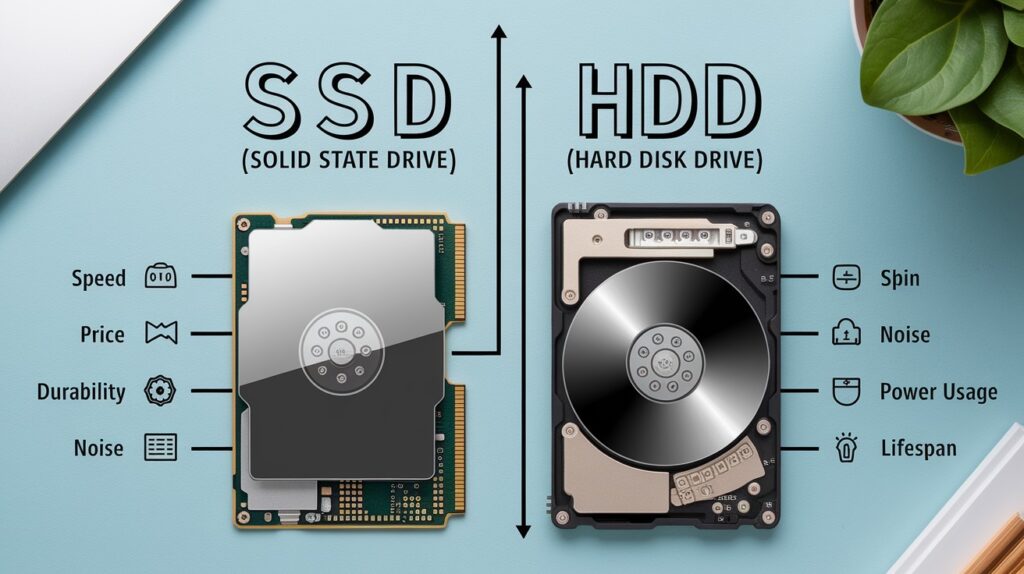
2. Choose the Right Drive (SSD vs HDD)
|
Feature |
SSD (Solid State Drive) |
HDD (Hard Disk Drive) |
|
Speed |
3-5x faster boot and load times |
Slower performance, mechanical delays |
|
Price |
Higher cost per GB |
More affordable storage option |
|
Durability |
No moving parts, shock resistant |
Mechanical parts are prone to failure |
|
Noise |
Silent operation |
Audible spinning and clicking sounds |
|
Power Usage |
Lower energy consumption |
Higher power requirements |
|
Lifespan |
5-10 years typical usage |
3-5 years average lifespan |
3. Check System Compatibility (BIOS/UEFI, Drivers)

Verify your motherboard supports the new drive interface (SATA, NVMe, or M.2) and check if your system uses BIOS or UEFI boot mode.
Download the latest drivers for your new drive and ensure your system firmware is updated to avoid compatibility issues during migration.
4. Ensure Enough Space on the New Drive

Calculate your current Windows installation size plus at least 20-30% extra space for future updates and temporary files.
A typical Windows 11 installation requires 64GB minimum, but aim for at least 120GB to maintain optimal performance and accommodate system growth.
Methods to Move Windows to Another Drive
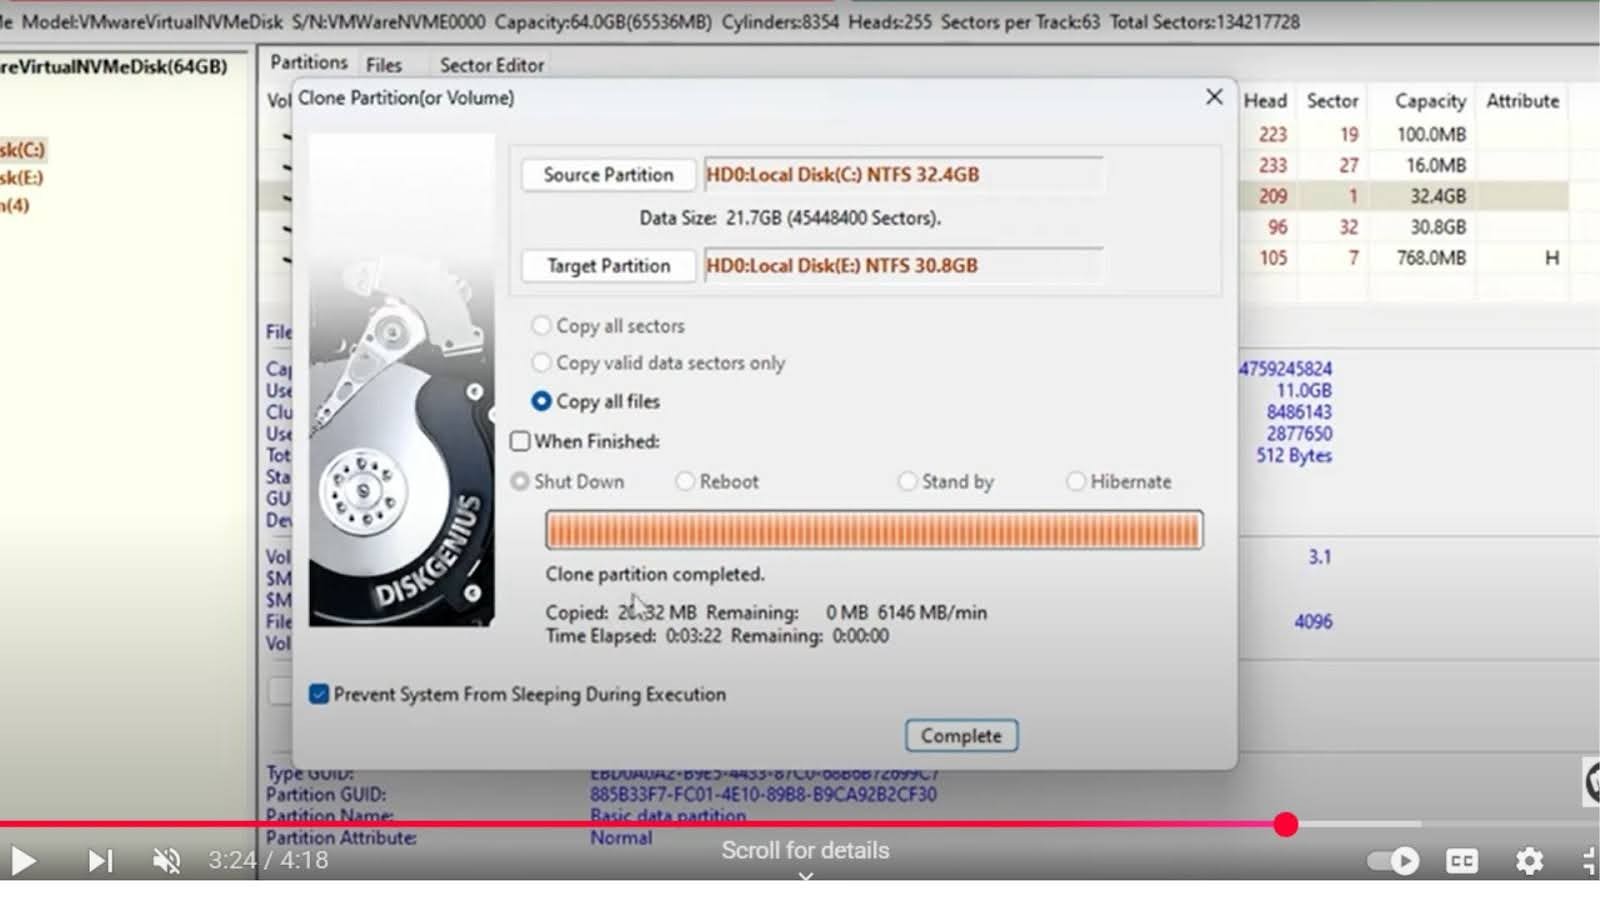
Method 1 – Using Disk Cloning Software
Overview of Tools
Popular cloning software includes Macrium Reflect (free version available), EaseUS Todo Backup, and Clonezilla for advanced users.
These tools create exact copies of your entire drive, including the operating system, programs, and personal files.
Step-by-Step Instructions
- Install your chosen cloning software and connect the new drive to your computer via USB or internal connection. Launch the software and select your current Windows drive as the source.
- Choose the new drive as the destination and configure cloning settings, ensuring partition sizes match your requirements. Start the cloning process, which can take 1-4 hours, depending on the data size.
- Once complete, shut down your computer and set the new drive as the primary boot device in BIOS/UEFI. Boot from the new drive to verify everything works correctly.
|
Pros |
Cons |
|
Copies everything exactly as-is |
Requires compatible cloning software |
|
No need to reinstall programs |
May copy old errors or bloatware |
|
Maintains all settings and preferences |
The cloning process can be time-consuming |
|
Relatively simple process |
The new drive must be the same size or larger |
Method 2 – Using Windows System Image Backup
How It Works
Windows System Image creates a complete snapshot of your system drive that can be restored to a new drive.
This built-in tool captures the operating system, installed programs, and system settings without requiring third-party software.
Step-by-Step Guide
- Open Control Panel > System and Security > Backup and Restore, then click the “Create a system image” option. Select an external drive or network location to store the image file.
- Create a Windows recovery drive using a USB flash drive through Control Panel > Recovery options. This bootable drive will help restore the system image to your new drive.
- Install the new drive, boot from the recovery USB, and select “System Image Recovery” to restore your backup. Follow the prompts to complete the restoration process.
When Is This Method Ideal?
This method works best when you want a Microsoft-supported solution and have sufficient external storage space.
It’s perfect for users who prefer using built-in Windows tools over third-party software.
|
Pros |
Cons |
|
Uses built-in Windows tools |
Requires external storage for the image |
|
No additional software needed |
More complex than cloning |
|
Creates compressed backup files |
The restoration process can be lengthy |
|
Reliable Microsoft-supported method |
May not work with all drive types |
Method 3 – Clean Installation of Windows on New Drive
- Downloading the ISO Visit Microsoft’s official website and download the Windows Media Creation Tool for your version.
Run the tool and select “Create installation media” to download the latest Windows ISO file to your computer. - Creating a Bootable USB Drive: Use the Media Creation Tool or Rufus software to create a bootable USB drive with the Windows ISO.
Ensure the USB drive has at least 8GB of space, and all data will be erased during this process. - Installing and Reactivating Windows Boot from the USB drive, and installing Windows on the new drive, formatting it during installation.
After setup, Windows should automatically activate if tied to your Microsoft account or hardware ID. - Fresh Start Benefits: A clean installation removes all bloatware, corrupted files, and accumulated system clutter for optimal performance. This method also ensures you’re starting with the latest Windows version and security updates.
|
Pros |
Cons |
|
Completely fresh, clean system |
Must reinstall all programs |
|
Removes bloatware and old files |
Time-consuming setup process |
|
The latest Windows version is installed |
Need to restore personal files |
|
Often fixes existing system issues |
May lose some settings and preferences |
Key Differences Between Cloning and Clean Installation
|
Aspect |
Cloning |
Clean Installation |
|
Definition |
Creates an exact copy of your entire drive, including OS, programs, and files |
Fresh Windows installation on the new drive, starting from scratch |
|
Time Required |
1-4 hours, depending on data size |
2-6 hours, including program reinstallation |
|
Programs |
All existing programs transfer automatically |
Must reinstall all programs manually |
|
Personal Files |
Everything stays exactly where it was |
Need to restore files from backup |
|
System Performance |
Carries over any existing slowdowns or issues |
Maximum performance with a clean system |
|
Complexity |
Moderate – requires cloning software |
Higher – multiple steps and reinstallation |
|
Bloatware |
Transfers unwanted programs and files |
Eliminates all bloatware and junk files |
|
System Errors |
May copy corrupted files or registry issues |
Fixes all existing system problems |
|
Windows Updates |
Keeps the current update status |
Installs the latest Windows version |
|
Best For |
Users wanting quick migration with minimal setup |
Users wanting optimal performance and a fresh start |
|
Risk Level |
Lower risk of losing functionality |
Higher risk if the backup is incomplete |
|
Storage Efficiency |
May waste space with unnecessary files |
Uses only essential files and programs |
Which One Should You Choose and Why?
Choose cloning if you want convenience and have a well-functioning system with all programs working perfectly.
Choose a clean installation if your current system has performance issues, contains bloatware, or you want maximum speed and efficiency from your new drive.
Conclusion
Moving Windows to another drive might seem daunting at first, but it’s manageable with the right approach and preparation.
Whether you choose cloning for convenience or a clean installation for peak performance, both methods can give your computer a significant boost.
Remember to always back up your important data before starting any migration process. Take your time with each step, and don’t rush through the setup.
The effort you put in now will pay off with faster boot times, improved performance, and more storage space.
Your computer will feel like new again, especially if you’re upgrading to an SSD. The difference in speed and responsiveness is genuinely noticeable in daily use.
With these methods in your toolkit, you’re ready to give your system the storage upgrade it deserves and keep it running smoothly for years to come.
Frequently Asked Questions
How long does it take to move Windows to another drive?
Cloning typically takes 1-4 hours, while a clean installation requires 2-6 hours, including program reinstallation and setup.
Will I lose my files when moving Windows to a new drive?
With cloning, file transfer is automatic. A clean installation requires restoring files from backup after Windows installation.
Can I use my old drive after moving Windows?
Yes, you can keep it for extra storage or backup after formatting the old Windows installation.


