Want to personalize your iPhone with that perfect song from your music collection?
Setting a custom ringtone from your music library can make your device truly yours, but Apple doesn’t make it as straightforward as you’d expect.
Many iPhone users assume they can simply select any track and make it their ringtone, but unfortunately, it’s not that simple.
You can’t directly use songs from Apple Music or most streaming services due to licensing restrictions. However, there are several effective ways to create custom ringtones from music you own.
In this guide, we’ll walk you through exactly how to set a ringtone on iPhone from the music library using three different methods.
From the no-computer GarageBand approach to traditional iTunes syncing, you’ll learn the complete process step-by-step.
Can You Set Any Song as a Ringtone on iPhone?
Apple’s Restrictions on Music Files
Apple Music and streaming services like Spotify use Digital Rights Management (DRM) protection, preventing you from converting their tracks into ringtones.
These songs are encrypted and can only be played within their respective apps. Even if you download songs for offline listening, they remain protected files that can’t be extracted or modified.
This restriction exists to protect artists’ copyrights and maintain licensing agreements between Apple and record labels.
Compatible File Types for Ringtones
iPhone ringtones must be in .m4r format, which is essentially an AAC audio file with a different extension.
The device also accepts .m4a files that can be converted to .m4r. Your ringtone should be 30 seconds or shorter for optimal performance, though longer files will work. MP3 files need conversion to AAC format first.
The audio quality should be between 128-256 kbps for the best balance of sound quality and file size.
Legal and Copyright Considerations
Only use music you legally own, such as purchased tracks from iTunes, Amazon Music, or physical CDs you’ve ripped.
Creating ringtones from copyrighted material you don’t own may violate copyright laws. Royalty-free music from sites like Freesound or Creative Commons is are safe alternative.
Remember that owning a streaming subscription doesn’t grant you ownership rights to modify or extract audio files from those platforms for personal ringtone creation.
Method 1 – Using GarageBand App (No Computer Needed)
Step-by-Step Instructions
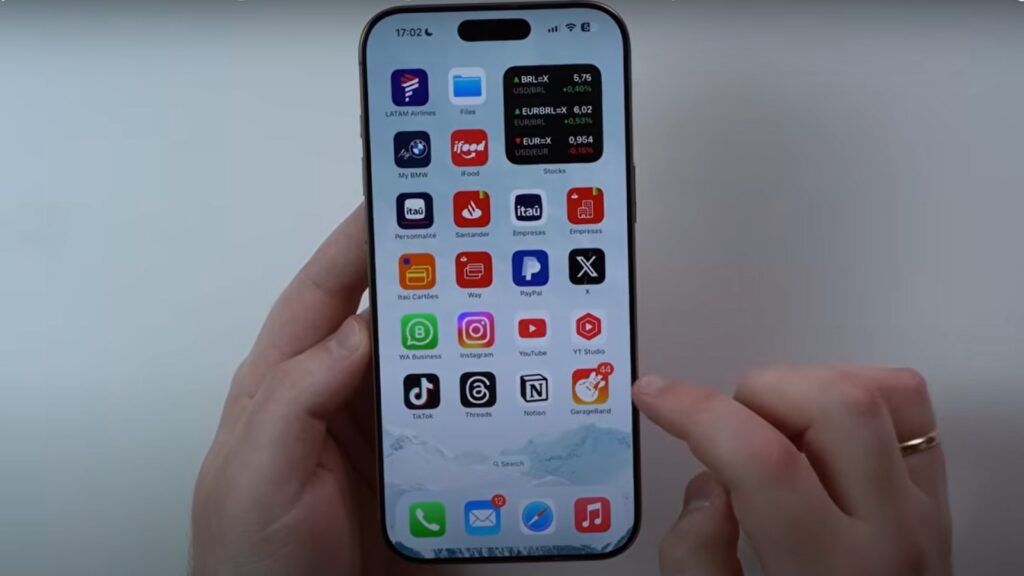
First, download GarageBand from the App Store if you don’t have it. Open the app and create a new project by selecting any instrument (keyboard works well).
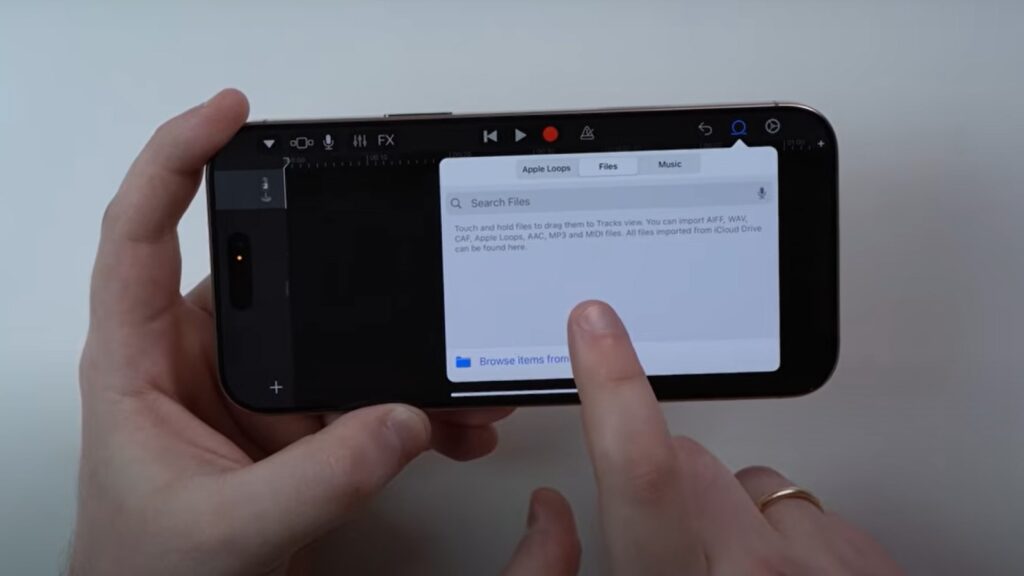
Tap the loop icon and choose “Files,” then “Browse items from the Files app” to import your song. Once imported, drag it to the timeline and use the scissors tool to trim your desired 30-second segment.
Tap the down arrow and select “Share,” then choose “Ringtone” to export your creation.
Setting the Exported Tone as Your Ringtone
After exporting, GarageBand will display your new ringtone with options to preview it. Tap “Use sound as…” and select “Standard Ringtone” to set it as your default tone immediately.
Alternatively, choose “Done” to save it to your ringtone library without setting it as default. You can also assign it to specific contacts by selecting “Assign to contact.”
The ringtone will automatically appear in Settings > Sounds & Haptics > Ringtone for future use.
Method 2 – Using iTunes on a Computer
Prepare the Song File
Open iTunes and locate your desired song in your music library. Right-click the track and select “Song Info,” then go to the “Options” tab.
Set your start and stop times to create a 30-second clip (note the exact timestamps you want). Click “OK” to save these settings.
Next, right-click the same song again and choose “Convert to AAC.” iTunes will create a duplicate AAC version of your trimmed segment while keeping the original file intact.
Change File Extension to .m4r
Find the newly created AAC file in your iTunes library and right-click it. Select “Show in Finder” (Mac) or “Show in Windows Explorer” (PC).
The file will have an .m4a extension. Right-click the file and choose “Rename.” Change the extension from .m4a to .m4r.
Your computer may warn you about changing file extensions. Click “Use .m4r” to confirm. This converts your audio file into a ringtone format that iPhone recognizes.
Sync the Ringtone to iPhone via iTunes/Finder.
Connect your iPhone to your computer using a USB cable. On Mac (macOS Catalina or later), open Finder and select your iPhone from the sidebar.
On older Macs or PC, open iTunes and click your device icon. Navigate to the “Tones” section and check “Sync Tones.”
You can choose to sync all ringtones or select specific ones. Click “Apply” or “Sync” to transfer your custom ringtone to your iPhone. The process may take a few minutes.
Set the New Ringtone on iPhone
Once syncing is complete, disconnect your iPhone and go to Settings. Scroll down and tap “Sounds & Haptics.” Select “Ringtone” from the list of sound options.
Your custom ringtone will appear under the “Custom” section at the top of the list. Tap on it to preview the sound, then tap “Back” and “Save” to set it as your default ringtone.
You can also assign it to specific contacts through the Contacts app.
Method 3 – Use Third-Party Apps
Recommended Apps for iPhone Ringtones
Several App Store applications simplify ringtone creation without requiring computer skills. Ringtones Maker allows you to import songs from your music library and trim them directly on your phone.
Zedge offers both ringtone creation tools and a vast library of pre-made ringtones and notification sounds.
GarageBand remains the most comprehensive free option, while apps like MP3 Converter and Ringtone Maker Pro provide additional editing features.
These apps typically handle file conversion automatically, making the process more user-friendly than manual methods.
Pros and Cons of Using Apps
|
Pros |
Cons |
|
Simple, intuitive interface for beginners |
Many apps require in-app purchases for full features |
|
No computer or technical knowledge needed |
Limited editing capabilities compared to desktop software |
|
Automatic file format conversion |
Ads and promotional content in the free versions |
|
Built-in preview and testing features |
Some apps have file size or duration restrictions |
|
Direct integration with iPhone settings |
Quality may vary between different applications |
|
Access to pre-made ringtone libraries |
Subscription fees for premium content and features |
Conclusion
Creating custom ringtones from your music library might seem complicated at first, but it’s achievable once you know the right steps.
The GarageBand method offers the most convenience since everything happens directly on your iPhone, while iTunes provides more precise control over your audio editing.
Third-party apps can work well, too, though watch out for those pesky in-app purchases.
Remember to stick with music you own, those streaming service tracks won’t work due to copyright protection.
Keep your ringtones around 30 seconds for the best experience, and don’t forget you can assign different tones to specific contacts for a truly personalized setup.
With any of these three methods, you’ll transform your iPhone’s sound profile and never have to settle for generic ringtones again.
Your favorite song is just a few steps away from becoming your signature ring.
Frequently Asked Questions
Can I use Apple Music songs as ringtones?
No, Apple Music tracks are DRM-protected and cannot be converted to ringtones. You need songs you own or have purchased.
What’s the ideal length for iPhone ringtones?
Keep ringtones between 20-30 seconds long. Shorter clips work better and won’t get cut off during incoming calls or notifications.
Why isn’t my custom ringtone appearing in Settings?
Check the file format (.m4r), ensure proper sync, and verify the file isn’t corrupted. Try restarting your iPhone after syncing.
Do I need a computer to create iPhone ringtones?
No, you can use GarageBand directly on your iPhone to create ringtones without needing a computer or iTunes sync.
Can I set different ringtones for different contacts?
Yes, open Contacts, select a person, tap “Edit,” then “Ringtone” to assign custom tones to individual contacts on your iPhone.