Are you tired of McAfee slowing down your Windows 11 computer?
Many users find themselves wanting to eliminate this antivirus software from their systems for various reasons, from performance issues to simply preferring other security solutions.
The good news? Learning how to remove McAfee from Windows 11 is straightforward when you know the right steps.
This comprehensive guide will walk you through multiple proven methods to completely uninstall McAfee from your Windows 11 device.
What you’ll learn:
- Simple removal methods that work every time
- How to handle stubborn leftover files
- Essential steps to secure your system afterward
- Troubleshooting tips for common problems
Ready to free your computer from unwanted McAfee software? Let’s get your Windows 11 system running smoothly again with our step-by-step removal process.
Why You Might Want to Remove McAfee?
1. Performance Impact
McAfee antivirus can significantly slow down your Windows 11 system in several ways.
The software runs continuous background scans that consume substantial CPU and memory resources, making your computer feel sluggish during everyday tasks.
Many users notice their boot times increase dramatically with McAfee installed, sometimes adding 30-60 seconds to startup.
Real-time protection features constantly monitor file activities, which can cause noticeable delays when opening applications or accessing files.
Gaming performance often suffers as well, with frame rate drops and stuttering occurring when McAfee scans kick in during gameplay.
2. Conflicts with Windows 11
Windows 11 comes with built-in Windows Defender, which provides robust protection without the need for third-party antivirus software.
Running both McAfee and Windows Defender simultaneously can create conflicts that reduce your system’s security effectiveness.
These dual antivirus programs may interfere with each other’s operations, leading to false positive detections, system crashes, or important security updates failing to install properly.
Some Windows 11 features and updates may also experience compatibility issues when McAfee is present.
3. Preference for Alternative Software
- Lighter alternatives available – Many users prefer antivirus solutions that offer better performance with minimal system impact
- Cost considerations – Free alternatives like Windows Defender or other security suites may provide adequate protection without subscription fees
- Feature preferences – Some antivirus programs offer better user interfaces, more customization options, or specific features that McAfee lacks
- Brand trust – Personal preferences for different security companies based on reputation, customer service, or past experiences
- Simpler solutions – Users who want basic protection without complex features and constant notifications may prefer streamlined alternatives
Methods for Removing McAfee
1. Uninstall via Windows Settings
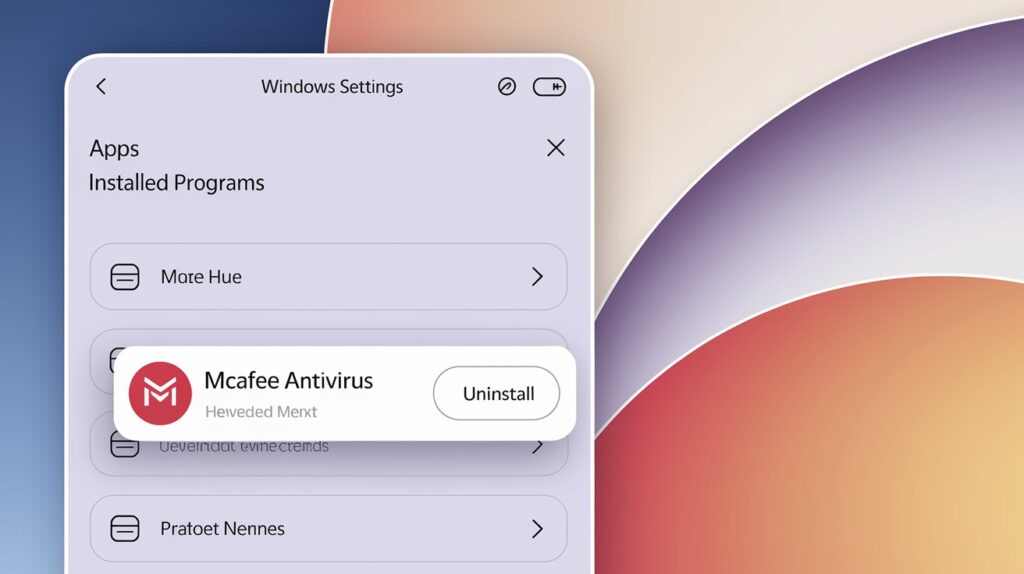
The most straightforward approach involves using Windows 11’s built-in uninstall feature through the Settings app.
This method works well for most standard McAfee installations and doesn’t require downloading additional software.
To access this option, open Windows Settings by pressing Windows key + I, then navigate to Apps > Installed apps. Scroll through the list to find McAfee products, click the three-dot menu next to each entry, and select “Uninstall.”
This process will launch McAfee’s uninstaller, which guides you through the removal steps.
While this method is user-friendly, it may not always remove every component completely, especially if McAfee was pre-installed by your computer manufacturer or if the installation has become corrupted.
2. Use the McAfee Removal Tool

McAfee provides an official removal utility called the McAfee Consumer Product Removal Tool (MCPR), specifically designed to eliminate all traces of their software.
This specialized tool is more thorough than standard uninstall methods and can handle stubborn installations that resist normal removal attempts.
The MCPR tool runs in Safe Mode and performs a deep scan of your system to locate and remove all McAfee components, including registry entries, temporary files, and background services.
This method is particularly effective for pre-installed McAfee software that came bundled with your computer.
You can download this free tool directly from McAfee’s official website, ensuring you get the most current version that’s compatible with Windows 11.
3. Manual Removal (Advanced Users)

For experienced users comfortable with system-level changes, manual removal offers the most control over the uninstallation process.
This method involves stopping McAfee services, removing program files, cleaning registry entries, and eliminating startup programs manually.
Manual removal requires careful attention to detail and basic knowledge of Windows system administration. You’ll need to access the Services console, Registry Editor, and file system to eliminate all McAfee components.
This approach is recommended only when other methods fail or when you need to remove specific components while preserving others.
Always create a system restore point before attempting manual removal, as incorrect changes can cause system instability.
Step-by-Step Guide for Easy Removal
Access the Settings Menu
Press the Windows key + I simultaneously to open the Settings app directly. Alternatively, right-click the Start button and select “Settings” from the context menu that appears.
Locate McAfee in Installed Apps
Click on “Apps” in the left sidebar, then select “Installed apps” from the main panel. Scroll through the alphabetical list or use the search box to quickly find all McAfee-related programs.
Follow the Uninstallation Steps
Click the three-dot menu next to each McAfee entry and select “Uninstall” to begin the removal process.
Follow the on-screen prompts from McAfee’s uninstaller, which may require administrator permissions and a system restart to complete.
Troubleshooting Uninstallation Issues
1. McAfee Not Uninstalling
- Run as Administrator – Right-click the uninstaller and select “Run as administrator” to ensure proper permissions for removal
- Disable real-time protection – Turn off McAfee’s active protection features before attempting uninstallation to prevent conflicts
- Use Safe Mode – Restart your computer in Safe Mode and try uninstalling from there to avoid interference from running processes
2. Leftover McAfee Files
- Clear Program Files folders – Manually delete remaining McAfee folders from both Program Files and Program Files (x86) directories
- Clean registry entries – Use Registry Editor (regedit) to search for and remove McAfee-related registry keys and values
- Remove AppData files – Check the AppData\Local and AppData\Roaming folders for hidden McAfee configuration files
3. Fixing Background Processes
- End processes in Task Manager – Open Task Manager, find McAfee processes, and end them before attempting removal
- Stop McAfee services – Access Services console (services.msc) and stop all McAfee-related services manually
- Use Process Explorer – Download Microsoft’s Process Explorer for more detailed process management and termination
Conclusion
Removing McAfee from your Windows 11 system doesn’t have to be complicated when you follow the right approach.
Whether you choose the simple Settings method, the thorough McAfee removal tool, or advanced manual techniques, you now have multiple options to eliminate this software from your computer.
Remember that Windows 11 comes with excellent built-in protection through Windows Defender, so you’re not left vulnerable after removal.
If you do encounter stubborn files or processes, the troubleshooting steps we covered will help you achieve a clean uninstall.
Your computer should run noticeably faster and smoother once McAfee is completely removed.
Take a moment to verify that Windows Defender is active or install your preferred alternative antivirus solution to maintain proper security coverage.
Ready to enjoy a cleaner, faster Windows 11 experience? Start with the Settings method and work your way through the options until you achieve complete removal.
Frequently Asked Questions
How do I remove the McAfee agent from Windows 11?
Use McAfee’s official MCPR removal tool, which specifically targets and removes all McAfee agents and background services completely from your system.
How do I get rid of unwanted McAfee?
Go to Settings > Apps > Installed apps, find McAfee entries, click uninstall, or use the official McAfee removal tool for thorough cleanup.
Do I need McAfee with Windows 11?
No, Windows 11 includes Windows Defender, which provides robust built-in antivirus protection, making third-party software like McAfee optional for most users.
How do I permanently remove McAfee from Windows 11?
Download and run McAfee’s Consumer Product Removal Tool (MCPR) in Safe Mode for complete, permanent removal of all McAfee components and files.
How do I get rid of fake McAfee pop-ups on Windows 11?
Run Windows Defender full scan, reset browser settings, check installed programs for suspicious software, and enable Windows pop-up blocker features.
